
Yes, I checked my calender this morning, but since my camera/blog was on the fritz, I couldn't post the outfits I made for the girls for the big day! So, now I'm playing catch-up to post a million old pics. Anyway, here they are:


All that work to post this and a pic is sideways. Unfortunately, I'm lazy :) The outfits are pretty heart-tastic, but they've worn it a few times since then. I was going to go out and buy fabric, but it kinda defeats the purpose of saving money.

I had to include the pics of my little Pudding crying, because it was so darn cute (poor girl).

We also made these little hair clips for the other little girls at gymnastics.


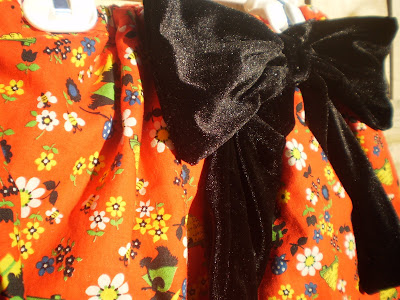 Then my mom gave me an old velvet skirt she had and no longer wanted (there's fate again). I decided to make some skirts for the girls and used the velvet underneath and made a big bow out of it. I like it when embellishments are big....very big.
 I had them wear it to church (of course I didn't take pictures---again), and found that I had to make a quick adjustment before leaving the house. See, I thought that I could accurately guess what Pumpkin's waist size was (she was asleep and I was getting quite a bit done). Long story short, I had to cut open the skirt, tightened the elastic, and did a little baste stitch to keep it closed. But...it still turned out okay...phew! We were only an hour late for church. HAHA Just kidding....we were on time.


 Then there was


 In the picture above, she is laying over a huge gap in between the chair and the coffee table. She can be a little odd sometimes...I have NO CLUE where she gets that from. wink-wink
 The plus side of making stuff for Pudding, she's so little that she has no idea what I'm doing (or what Christmas is). So...I can try it on her and see how everything fits :) Here is how it turned out:


 What's with the flower, you ask?? It's a pin (cool, huh?). You can use it to hold your scarf in the style you want, or you can pin it to a shirt, jacket, purse...whatever. Give it to a little girl if you want. Both are part of the giveaway.
 **If you want to enter, just leave a comment. If you post annonymously because you dont have a google accout, just put your name at the bottom of your post.
 Not exactly your traditional Red. So...here is how it turned out:
 There weren't very many pictures of Pudding. Everytime we went out, whether for a Trunk or Treat or on Halloween night, she was already really sleepy.
 I'm pretty excited to make their costumes next year! Hope everyone had a Happy Halloween!
 Anyway, I've been getting bad about not posting very much crafty stuff. But...I was working on my greatest project yet. MY OWN PATTERN!! I've never done this before. I've always understood the concept, but I always thought it would be too difficult for me. Turns out...it's not difficult at all. I think anyone with a fair amount of sewing knowledge could do it.


 Anyway, measure how much elastic you need for your child's waist. I sewed the elastic ends together twice (in pink so you can see) because Pumpkin is pretty ruff sometimes. I would use elastic that's about 1/4" thick. If you don't have it, and you have something else....use it. I really don't think it matter, because the elastic will curl and twist while you're doing it anyway (as you will see).
 As for your tulle, I cut it into strips that were about 10" x 24". If you buy your tulle by the yard rather than on a spool, just cut 10" strips down it, and on the fold of the yardage, cut (like in pic).

 Here is how you attach it to the elastic. I used a piece of fabric to better illustrate. You fold your tulle in have, making a loop on one side of the elastic. Take the ends and wrap it around the elastic and pull it through the loop. Just like a tassle on a bookmark.
  Do this all around your elastic. Make it as full as you want. You can add litte embellishments also. I put ribbon on mine. But wait....that's not all I'm going to do with it. (I just didn't finish it yet)
 Measure your child's waist...or your waist (I think I'm gonna make one of these for me). You can leave the ribbon single or you can double it like I did. It just gives it more strength and sturdiness. Back to doubling...take that measurement and double it. Pull the loops through until it's in the middle of your ribbon.
 Sew it in place. Burn (or singe) the ends of the ribbon so it won't fray if you wash it. I then sewed down both sides of the belt and over the end. For the end, I folded both sides inward, facing each other. You can just fold both ends over together if you want.
  And then you're done.


