
My little princess just reminded me of something we made a few months ago out of cartons. These are really cute coin purses. You can find the template here.
 I've been getting more comments about the clothes then anything else so I'm going to start working on a tutorial for that today. They are really easy as well (lots of room for mishaps). I'm going to take a pain navy blue T-Shirt that's too big and turn it into something more fitted with ruffles. If you want to follow along, all you need is your shirt, sewing machine, matching thread and elastic thread (that you can pick up @ Hobby Lobby). Anyway...Happy Crafting!
 These are my first Christmas gifts of the season. They are little clutch purses made of placemats. I thought it would be fun to fill them with hair bows, and a cute little quiet activity for church (that's for another post). Anyway, I was going to do a huge tutorial about how to sew them, but for the most part it's self explanatory. However, Jessica from Happy Together has an amazing tutorial for them, here. So this tutorial is mainly on embellishing one and making it personalized.

 Fold the strip in half and stitch it closed.
 Baste stitch by the seam and pull to make it all gather together, like a flower. Cut the excess fabric (save for another flower if you want).
 Now you can just hand stitch it closed.
 Then you end up with a little flower. Also like a yo-yo (if anyone knows that sewing term).
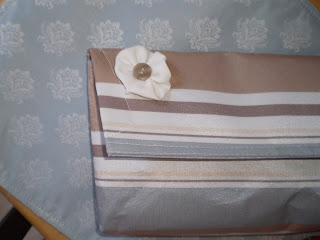 Then stitch it onto the clutch. And add a cute button in the middle. I made two flowers, because I didn't have bigger buttons so I made my flowers smaller. The bigger the flower, the bigger the button.
 If you want to personalize it, then all you need is to cut out a letter in felt (cuz felt doesn't fray). This was the most time consuming part, because I chose to stitch it on. You can glue it and it will look just as cute.
  And there you have it! All done and ready to go to church/school or...whatever. These are actually quite spacious and can be fill with school supplies or quiet things for church. My very talented sister-in-law uses these as baby shower gifts and puts diapers and a travel wipes case in them. They are great all around.
 You guessed it! I still don't know how to rotate pics. Anyway, here is a nightgown that I made for my oldest out of an old t-shirt i had. I would've just used it as a dress, but it's a little see-through in the back. It was super easy. I'm gonna have to do a tutorial on them. It literally takes 10-15 min. ---hat not included---
